


The robot blimp is a project that I am currently working on as part of a weekly visit by a Seattle high school.
 The group wanted to come up with some ideas that could help firefighters while they fight forest fires. While many of the ideas were good, they all had one thing in common. They needed something high over the fire to help relay radio transmission, get a better image of what is going on with the fire, and to provide real time data to the ground crew. We thought that a robot blimp could do all of that rather well and set out to see if it was possible.
 The video is of version 1 of the blimp. I tried placing the horizontal thrusters on the sides of the balloon. Version 2 moved the horizontal thrusters to the gondola to ensure that they were evenly spaced. That worked much better. For now it flies with no sensor feedback, we just wanted to see if it could fly according to it’s program. Next we will start adding sensors and trying to reduce as much weight as possible.
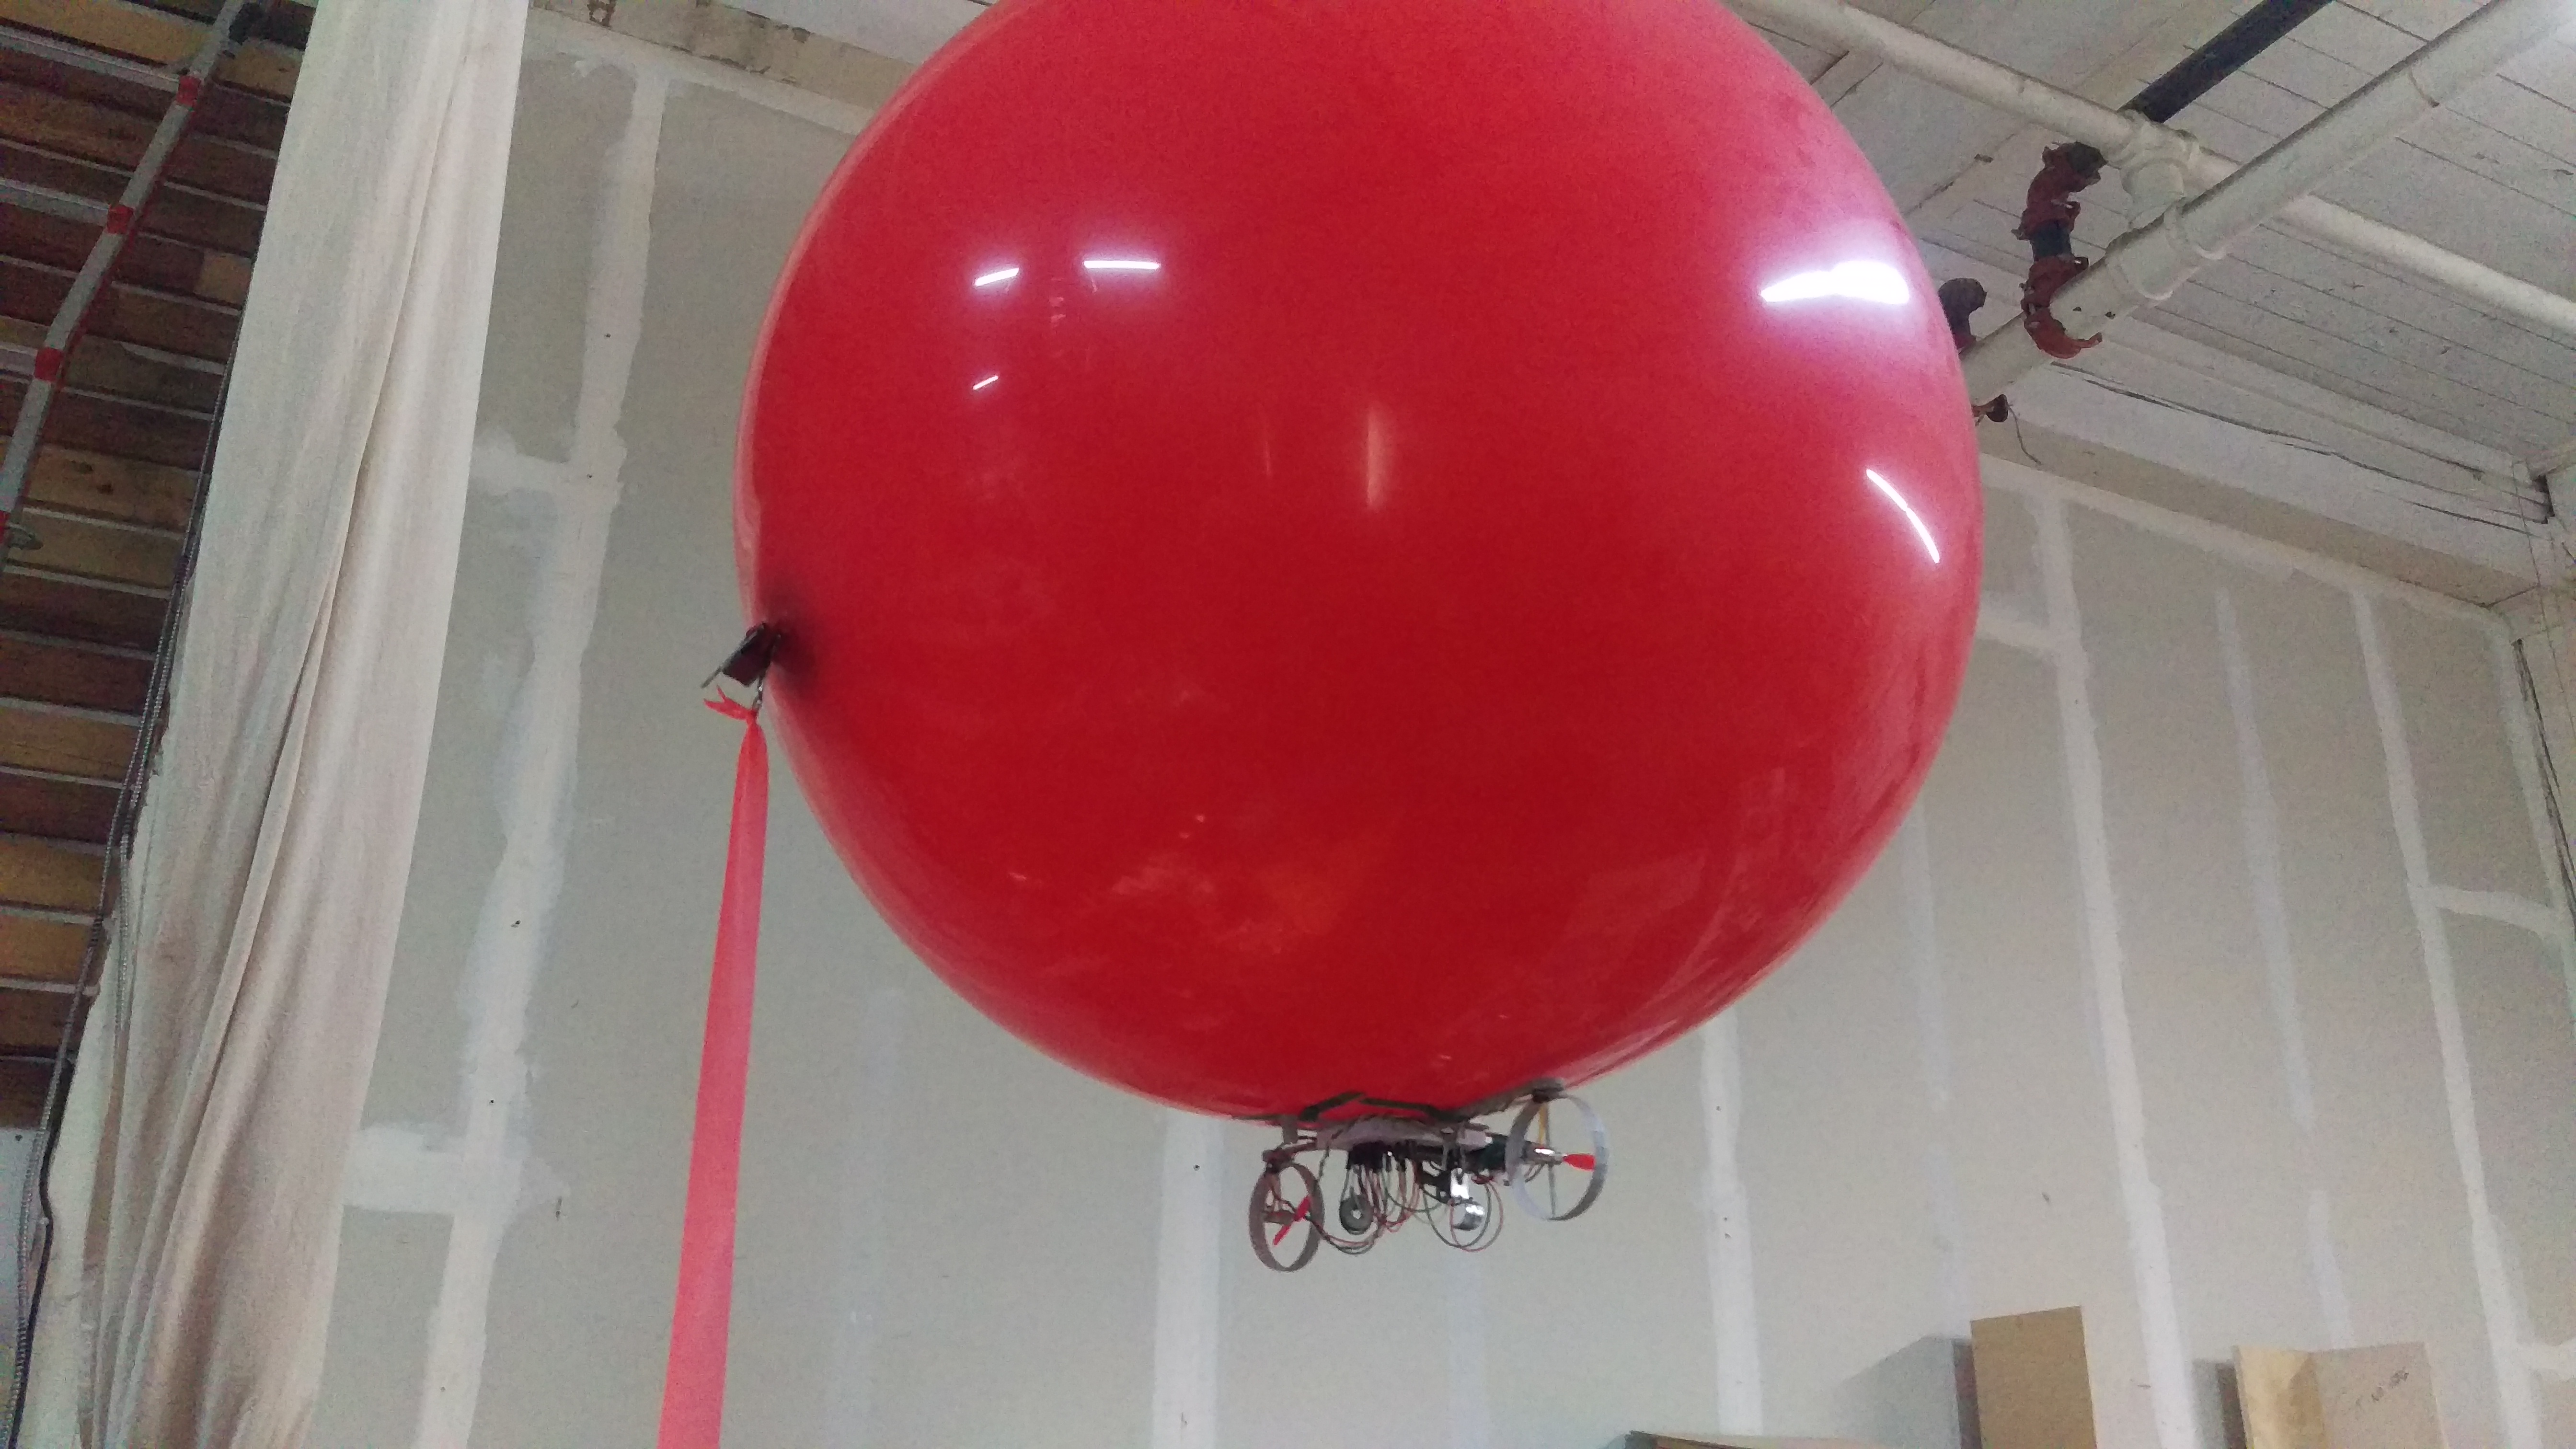
The balloon is a 32″ helium filled latex monster and that is just enough to lift all of the hardware that is needed, plus a few extra Grams. We will likely add an gyroscope/accelerometer and Sonar sensor to help with some basic nav.
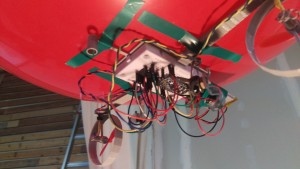
The Adafruit ProTrinket connects to a dual H-bridge that control the horizontal thrusters. One more motor will be added for vertical control later.
The thrusters are basically just replacement motors from a mini quad copter that I found on Amazon. They were cheap and they already come on counter spinning sets.
3D Files:
http://www.thingiverse.com/thing:1117536
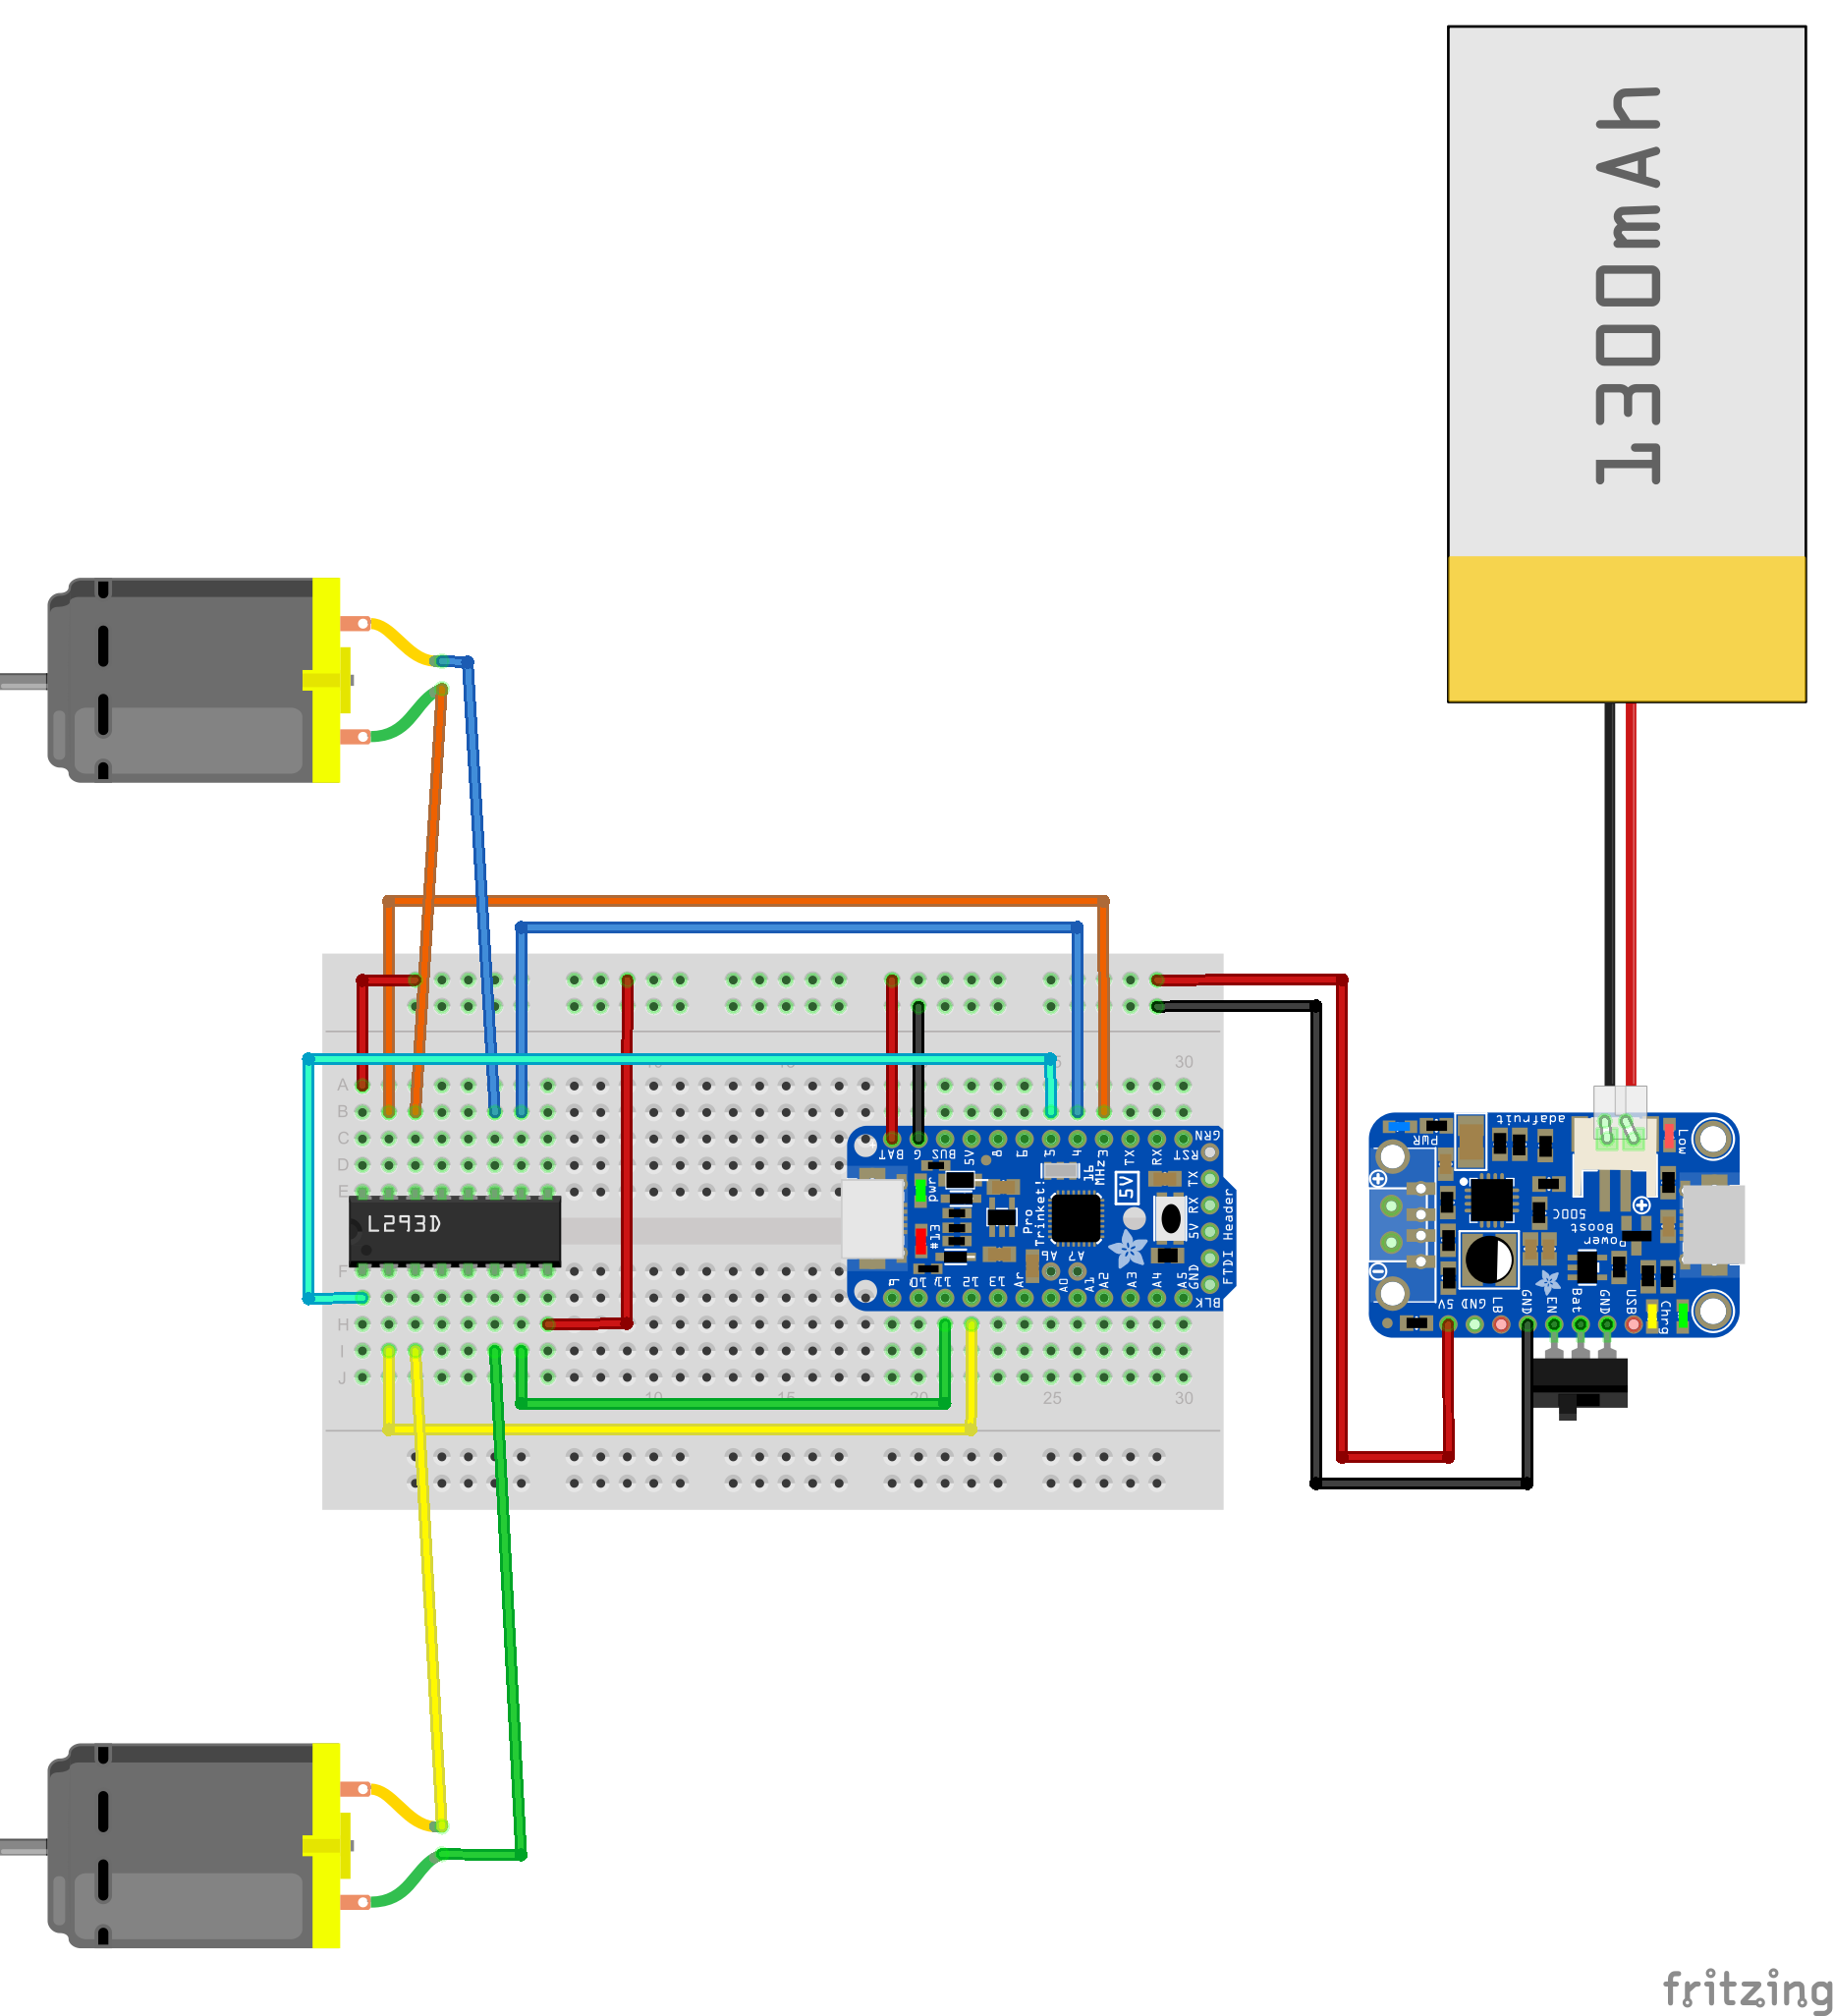
Wiring:
Arduino Code:
/*
 Blink
 Turns on an LED on for one second, then off for one second, repeatedly.

 Most Arduinos have an on-board LED you can control. On the Uno and
 Leonardo, it is attached to digital pin 13. If you're unsure what
 pin the on-board LED is connected to on your Arduino model, check
 the documentation at http://arduino.cc

 This example code is in the public domain.

 modified 8 May 2014
 by Scott Fitzgerald
 */

const int Lblack = 4; // Right motor - Blue wire
const int Lred = 3; // Right motor - Orange wire
const int Loffset = 130;
const int Rblack = 11; // Right motor - Green wire
const int Rred = 12; // Right motor - Yellow wire
const int Roffset = 250;
const int MotorSpeed = 8; // Overall motor speed using PWM

// the setup function runs once when you press reset or power the board
void setup() {
 // initialize digital pin 13 as an output.
 pinMode(Rblack, OUTPUT);
 pinMode(Rred, OUTPUT);
 pinMode(Lblack, OUTPUT);
 pinMode(Lred, OUTPUT);
 analogWrite(MotorSpeed, 255);
}

// the loop function runs over and over again forever
void loop() {
 MoveF(3000);
 TurnL(1000);
// MoveF(1000);
// TurnR(500);
// MoveF(1000);
// MoveB(2000);
}

/* The Hack-E-Bot can now be programmed to move by giving it instructions like:
MoveStop(stopTime); -- to stop moving
MoveF(moveSpeed, moveTime); -- to drive forward
MoveB(moveSpeed, moveTime); -- to drive backward
TurnR(moveSpeed, moveTime); -- to turn right
TurnL(moveSpeed, moveTime); -- to turn left

stopTime and moveTime are mesured in miliseconds.
moveSpeed is a number between 0 to 90 with 0 being no movment and 90 being full speed.
*/

void MoveStop(int T){ // Stop moving, T = stopTime.
 digitalWrite(Lblack, LOW);
 digitalWrite(Lred, LOW);
 digitalWrite(Rblack, ! Roffset);
 digitalWrite(Rred, ! Roffset);
 delay(T);
}

void MoveF(int T){ // Move forward, S = moveSpeed, T = moveTime.
 analogWrite(Lblack, Loffset);
 digitalWrite(Lred, ! Loffset);
 analogWrite(Rblack, Roffset);
 digitalWrite(Rred, ! Roffset);
 delay(1000);
 MoveStop(1);
 delay(T);
 digitalWrite(Lblack, ! Loffset);
 analogWrite(Lred, Loffset);
 digitalWrite(Rblack, ! Roffset);
 analogWrite(Rred, Roffset);
 delay(500);
 MoveStop(1);
}

void MoveB(int T){ // Move backward, S = moveSpeed, T = moveTime.
 digitalWrite(Lblack, ! Loffset);
 analogWrite(Lred, Loffset);
 digitalWrite(Rblack, ! Roffset);
 analogWrite(Rred, Roffset);
 delay(1000);
 MoveStop(1);
 delay(T);
 digitalWrite(Lblack, ! Loffset);
 analogWrite(Lred, Loffset);
 digitalWrite(Rblack, ! Roffset);
 analogWrite(Rred, Roffset);
 delay(500);
 MoveStop(1);
}

void TurnL(int T){ // Turn Left, S = moveSpeed, T = moveTime.
 digitalWrite(Lblack, ! Loffset);
 analogWrite(Lred, Loffset);
 digitalWrite(Rblack, Roffset);
 analogWrite(Rred, ! Roffset);
 delay(T);
 analogWrite(Lblack, Loffset);
 digitalWrite(Lred, ! Loffset);
 digitalWrite(Rblack, ! Roffset);
 analogWrite(Rred, Roffset);
 delay(500);
 MoveStop(1);
}

void TurnR(int T){ // Turn Right, S = moveSpeed, T = moveTime.
 analogWrite(Lblack, Loffset);
 digitalWrite(Lred, ! Loffset);
 digitalWrite(Rblack, ! Roffset);
 analogWrite(Rred, Roffset);
 delay(T);
 analogWrite(Lblack, Loffset);
 digitalWrite(Lred, ! Loffset);
 digitalWrite(Rblack, ! Roffset);
 analogWrite(Rred, Roffset);
 delay(500);
 MoveStop(1);
}