


Intro
This will walk you through setting up a Raspberry Pi Web server with Raspbian Buster Lite. The following services will be installed and available by the end of this tutorial.
- Apache web server
- MySQL database
- PHP
- MediaWiki
- MQTT
What You Need
Setting Up Your Pi
First we will need to set your Raspberry Pi up with SSH and get it connected to the internet via WiFi.
This tutorial will help you get that going:
Installing Apache
Now that we have the Pi connected to the Internet and logged in via SSH, it is time to install our web server. We will be using Apache because like everyone uses it and it is free. Apache is software that runs on a server to handle all the stuff like HTML and HTTP data. Basically all the cool stuff that we see in our web browsers.
From your Pi’s SSH window, run the following commands:
sudo apt-get install apache2 -yThis may take a bit of time to install…
Next we can test this install by going to the IP address assigned to the Pi from any web browser on your network.
Get the IP address of your Pi by running the command:
hostname -I
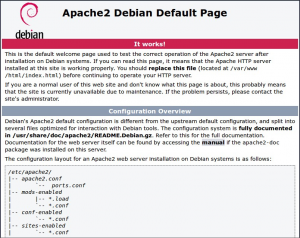
Your IP address should start with something like 192.168. My Pi was given the address 192.168.1.87 so if I type that into the address bar of my web browser, I get a page that looks like this:
Now we know that Our web server is running. You should also be able to get the same page by going to http://raspberrypi.local/
Install MySQL and PHP
First we will install MySQL
sudo apt install mariadb-server
Now we will install PHP
sudo apt-get install php libapache2-mod-php -y
Remove the index.html page from your www/html folder.
sudo rm /var/www/html/index.html
We will replace this file with an index.php page.
sudo nano /var/www/html/index.php
Add the following code to the file:
<?php phpinfo(); ?>
Exist and save this file.
Now go to http://raspberrypi.local/ and you should see a bunch of info about your PHP install.
We need to create an account for the Database so run the following code.
sudo mysql -p -u root
Set a password for this user, then when MariaDB is loaded, run the following command but replace username and password with one of your choosing.
GRANT ALL PRIVILEGES ON *.* TO 'username'@'localhost' IDENTIFIED BY 'password';
Remember this password and username as you will need it later. Close the Database:
quit
Restart the MySQL service:
sudo service mysql restart
Install MediaWiki
For those of you unfamiliar with a Wiki, this is basically like an HTML interface for a Database on a web server. It means that to don’t need a web browser to create, edit, or organize new pages. Wikipedia runs on MediaWiki and it is perfect for our own use on our new Pi server.
Click here for more information on what a Wiki is.
sudo apt-get install mediawiki
This one will take a while to install. Basically we are creating a Content Management System (CRM). This is the backbone of what most people consider the internet and it consists of a few applications working together.
- Apache handles communication between the server (your Pi) and client (the person browsing your site).
- MySQL is a Database that runs on the server and is protected from the outside world.
- PHP filters requests for data from the client and sends it it back, if the client has permission to get said data. It also handles the dynamic assembly of HTML files that get served through Apache. That way sensitive data is not exposed in the code going out to the client.
- MediaWiki is basically a UI that has been pre-written for use with PHP and MySQL.
This is all a bit overly simplified, but that is the basics anyway.
Restart the Apache server
sudo /etc/init.d/apache2 restart
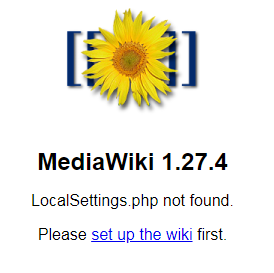
If all worked out, you should be able to go to http://raspberrypi.local/mediawiki/ and see this page:
- Click the link to set up the wiki
- Select your desired language
- The next page checks to see if things are working correctly. If you see some green text that says “The environment has been checked. You can install MediaWiki.” then click the Continue button.
- Skip down to Database username.
- Enter the username that you created for MySQL earlier.
- In the Database password field, enter the password set up for the MySQL user.
- Click the Continue button.
- Note: If the connection to MySQL fails, they the steps found in this post.
- Leave these settings alone and just click the Continue button.
- Enter in a name that you want to use for this Wiki.
- Skip down to the Administrator account.
- Fill in all of the information to set up a login for making changes to the Wiki via the browser interface.
- Click the Continue button.
- Select the desired User rights profile.
- Do not enable E-mail settings unless your Raspberry Pi will be connected to the internet rather than a NAT.
- Check the boxes next to any Extensions you wish to add to your Wiki.
- Be sure to check the Enable file uploads so that you can add photos later.
- Click the Continue button.
- Once this is done, click the Continue button.
- The page should now say that your settings file is complete.
- Click the Download LacalSettings.php link.
- Open this file with a Notepad++
In the SSH window run the following command:
sudo nano /var/lib/mediawiki/LocalSettings.php
Select all of the text in the LacalSettings.php file and copy it.
Click on the SSH window, which should now have a blank file open, then, right click on the center of the window. All of that text should start to appear in the file. Once done, save and close the LacalSettings.php in the SSH window.
Now go to http://raspberrypi.local/mediawiki/ and see if your new Wiki is all set up. If it works, there should be all kinds of resources for editing pages once you are logged in.
Install Samba
Samba makes it easy to share files over a network without having to use FTP. Once installed, your Pi will show up as a regular network drive.
From the SSH window run:
sudo apt update && sudo apt full-upgrade -y

sudo apt-get install samba samba-common-bin
Once finished we need to make a shared folder and set permissions for it. The 1 prevents this folder from being deleted by accident. The 777 sets it so that all users can read/write/execute files in this folder.
sudo mkdir -m 1777 /share
Now we need to add some setting to the smb.conf file
sudo nano /etc/samba/smb.conf
Add the following code to the bottom of this file.
[share]
Comment = Pi shared folder
Path = /share
Browseable = yes
Writeable = Yes
only guest = no
create mask = 0777
directory mask = 0777
Public = yes
Guest ok = yes
Now we do want to create a user account for Samba
sudo smbpasswd -a pi
You will be asked to enter a password for this. Now it is time to restart Samba.
sudo /etc/init.d/samba restart
Once finished your Raspberry Pi should pop up under Network, if your network discovery is turned on.
You should be able to navigate through it just like any other folder.
Let’s add MQTT
sudo wget http://repo.mosquitto.org/debian/mosquitto-repo.gpg.key
sudo apt-key add mosquitto-repo.gpg.key
cd /etc/apt/sources.list.d/
sudo wget http://repo.mosquitto.org/debian/mosquitto-wheezy.list
sudo apt-get update
sudo apt-get -y install mosquitto mosquitto-clients
Test by starting the service
sudo /etc/init.d/mosquitto start
open a new Putty terminal
In the first terminal enter the following:
mosquitto_sub -d -t hello/world
In the second Window, enter:
mosquitto_pub -d -t hello/world -m "Hello from Terminal 2!"
If successful, the packet sent from terminal window 2 should appear in window 1
Change raspberrypi.local to something else.
Change the host name so that we don’t have to always use the Pi’s IP address but we also do not want to use the generic name that all Pi’s use for default.
sudo nano /etc/hosts
Change the raspberrypi to whatever name your want then save this file. Do not change anything else.
sudo nano /etc/hostname
Change this to match your new host name
To commit the changes, reboot the Pi.
sudo reboot
Install the E-Ink display
Run
sudo raspi-config
Select Interfacing Options
Select I2C and enable it
Also enable Remote GPIO
Note: E-ink python scripts live in the following directory path:
/PaPiRus/RTC-Hat-Examples
Reference Links:
SETTING UP A RASPBERRY PI AS AN ACCESS POINT IN A STANDALONE NETWORK (NAT)